
Cài LAMP (apache2, php, mysql) trên Ubuntu 16.04 LTS

Bước 1 : Cài Apache
Apache là một dịch vụ web server đa nền tảng và mã nguồn mở. Apache cung cấp đầy đủ các tiện ích cần có của một web server như CGI, tên miền ảo (virtual domains)...
Vào Terminal Ubuntu. Để cài đặt Apache , trên chạy lệnh :
sudo apt-get install apache2Các lệnh bật , khởi động và kiểm tra trạng thái của Apsche
root@ubuntu:~# systemctl    enable  apache2
root@ubuntu:~# systemctl    start  apache2
root@ubuntu:~# systemctl    status  apache2

apache2.service - LSB: Apache2 web server
   Loaded: loaded (/etc/init.d/apache2; bad; vendor preset: enabled)
   Active: active (running) since Wed 2016-03-02 09:23:37 PST; 1min 2s ago
     Docs: man:systemd-sysv-generator(8)
   CGroup: /system.slice/apache2.service
           ├─22328 /usr/sbin/apache2 -k start
           ├─22331 /usr/sbin/apache2 -k start
           └─22332 /usr/sbin/apache2 -k start

Mar 02 09:23:36 ubuntu systemd[1]: Starting LSB: Apache2 web server...
Mar 02 09:23:36 ubuntu apache2[22304]:  * Starting web server apache2
Mar 02 09:23:36 ubuntu apache2[22304]: AH00558: apache2: Could not reliably determine the server's fully qualified domain name, using 127.0.1.1. Set the 'S
Mar 02 09:23:37 ubuntu apache2[22304]:  *
Mar 02 09:23:37 ubuntu systemd[1]: Started LSB: Apache2 web server.
Mar 02 09:24:34 ubuntu systemd[1]: Started LSB: Apache2 web server.
Kiểm tra cài đặt Apache thành công hay chưa
Mở trình duyệt web của bạn(Chrome, Firefox, Cốc Cốc...), nhập một trong các địa chỉ sau
localhost
# hoặc
127.0.0.1
Nếu là vps server, có thể kiểm tra trực tiếp tại địa chỉ của máy chủ
server-ip-address Nếu kết quả trả về như hình vẽ dưới đây tức là bạn đã cài Apache thành công

Bước 2. cài MySQL
MySQL là một hệ quản trị cơ sở dữ liệu quan hệ (RDBMS) chạy dưới dạng máy chủ cung cấp đầy đủ các phương thức truy cập tới cơ sở dữ liệu có nhiều người dùng
Cài đặt, trên Terminal gõ lệnh
sudo apt-get install mysql-server mysql-clientTrong quá trình cài đặt, bạn sẽ nhận được thông báo yêu cầu nhập mật khẩu cho tài khoản quản trị root, hãy nhập mật khẩu và bấm enter hoặc chọn ok

Nhập lại mật khẩu một lần nữa
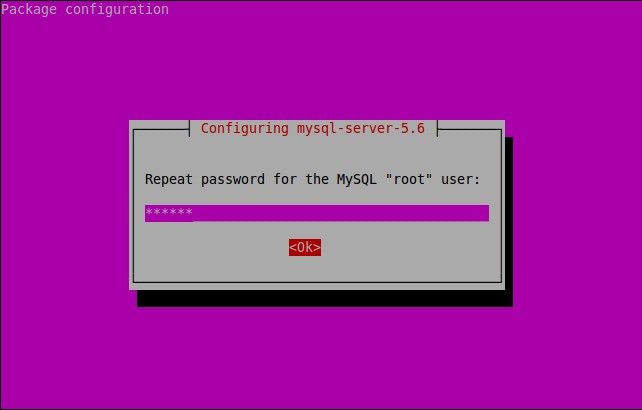
MySQL đã được cài đặt
Bạn có thể kiểm tra trạng thái của MySQL bằng cách gõ lệnh :
Trên Ubuntu 16.04/15.10/15.04
sudo systemctl status mysqlTrên Ubuntu 14.10 và các phiên bản cũ hơn :
sudo service mysql statusKết quả:
mysql.service - MySQL Community Server
 Loaded: loaded (/lib/systemd/system/mysql.service; enabled; vendor preset: enabled)
 Active: active (running) since Mon 2015-10-26 14:23:01 IST; 28s ago
 Main PID: 3577 (mysqld_safe)
 CGroup: /system.slice/mysql.service
 ├─3577 /bin/sh /usr/bin/mysqld_safe
 └─3924 /usr/sbin/mysqld --basedir=/usr --datadir=/var/lib/mysql --...

Oct 26 14:23:00 server systemd[1]: Starting MySQL Community Server...
Oct 26 14:23:00 server mysqld_safe[3577]: 151026 14:23:00 mysqld_safe Can't ....
Oct 26 14:23:00 server mysqld_safe[3577]: 151026 14:23:00 mysqld_safe Loggin....
Oct 26 14:23:01 server mysqld_safe[3577]: 151026 14:23:01 mysqld_safe Starti...l
Oct 26 14:23:01 server systemd[1]: Started MySQL Community Server.
Hint: Some lines were ellipsized, use -l to show in full.
3. Install MariaDB (tùy chọn)
In case you want to use MariaDB instead of MySQL community edition, follow the steps given below.
MariaDB is a drop in replacement for MySQL. It is a robust, scalable and reliable SQL server that comes rich set of enhancements.
First you have to remove existing MySQL packages if any. To completely uninstall MySQL along with its configuration files, enter the following commands one by one:
sudo systemctl stop mysql
sudo apt-get remove --purge mysql-server mysql-client mysql-common
sudo apt-get autoremove
sudo apt-get autoclean
sudo rm -rf /var/lib/mysql/
sudo rm -rf /etc/mysql/
After removing MySQL, run the following command to install MariaDB.
sudo apt-get install mariadb-serverAlternatively, you can install it using MariaDB repository if you want to try most recent version of MariaDB. Run the following commands to add PPA. As of writing this, MariaDB PPA is not yet updated to Ubuntu 16.04. However, we can use the repository of Ubuntu 15.10 instead.
sudo apt-get install software-properties-common
sudo apt-key adv --recv-keys --keyserver hkp://keyserver.ubuntu.com:80 0xcbcb082a1bb943db
sudo add-apt-repository 'deb http://download.nus.edu.sg/mirror/mariadb/repo/10.1/ubuntu vivid main
Update the software sources list and install MariaDB using following commands:
sudo apt-get update
sudo apt-get install mariadb-server
During installation you will be asked to set mysql ‘root’ user password. Enter the password twice, and complete the installation.
Important Note: In Ubuntu 16.04/15.10/15.04, MariaDB won’t ask you to set root user password during installation. Also, you can’t set password manually using the following command too:
mysql_secure_installationIt will throw the following error.
NOTE: RUNNING ALL PARTS OF THIS SCRIPT IS RECOMMENDED FOR ALL MariaDB
 SERVERS IN PRODUCTION USE! PLEASE READ EACH STEP CAREFULLY!

In order to log into MariaDB to secure it, we'll need the current
password for the root user. If you've just installed MariaDB, and
you haven't set the root password yet, the password will be blank,
so you should just press enter here.

Enter current password for root (enter for none):
**ERROR 1698 (28000): Access denied for user 'root'@'localhost'**
Enter current password for root (enter for none):
To fix this error, log in to mysql prompt without password as root user:
sudo mysql -u rootThen, run the following commands one by one in the mysql prompt:
use mysql;update user set plugin='' where User='root';flush privileges;\qThat’s it. Now, set database administrative “root” user password using command. Press Enter and go with the default settings.
mysql_secure_installationSample output:
NOTE: RUNNING ALL PARTS OF THIS SCRIPT IS RECOMMENDED FOR ALL MariaDB
      SERVERS IN PRODUCTION USE!  PLEASE READ EACH STEP CAREFULLY!

In order to log into MariaDB to secure it, we'll need the current
password for the root user.  If you've just installed MariaDB, and
you haven't set the root password yet, the password will be blank,
so you should just press enter here.

Enter current password for root (enter for none):
OK, successfully used password, moving on...

Setting the root password ensures that nobody can log into the MariaDB
root user without the proper authorisation.

Set root password? [Y/n] y
New password:
Re-enter new password:
Password updated successfully!
Reloading privilege tables..
 ... Success!

By default, a MariaDB installation has an anonymous user, allowing anyone
to log into MariaDB without having to have a user account created for
them.  This is intended only for testing, and to make the installation
go a bit smoother.  You should remove them before moving into a
production environment.

Remove anonymous users? [Y/n]
 ... Success!

Normally, root should only be allowed to connect from 'localhost'.  This
ensures that someone cannot guess at the root password from the network.

Disallow root login remotely? [Y/n]
 ... Success!

By default, MariaDB comes with a database named 'test' that anyone can
access.  This is also intended only for testing, and should be removed
before moving into a production environment.

Remove test database and access to it? [Y/n]
 - Dropping test database...
ERROR 1008 (HY000) at line 1: Can't drop database 'test'; database doesn't exist
 ... Failed!  Not critical, keep moving...
 - Removing privileges on test database...
 ... Success!

Reloading the privilege tables will ensure that all changes made so far
will take effect immediately.

Reload privilege tables now? [Y/n]
 ... Success!

Cleaning up...

All done!  If you've completed all of the above steps, your MariaDB
installation should now be secure.

Thanks for using MariaDB!
Check if mariadb is running or not, using the following command:
sudo service mysql statusSample output:
mysql.service - LSB: Start and stop the mysql database server daemon
**Loaded: loaded (/etc/init.d/mysql)**
** Active: active (running) since Mon 2015-10-26 14:26:36 IST; 2min 5s ago**
 Docs: man:systemd-sysv-generator(8)
 CGroup: /system.slice/mysql.service
 ├─6387 /bin/bash /usr/bin/mysqld_safe
 ├─6388 logger -p daemon err -t /etc/init.d/mysql -i
 └─6544 /usr/sbin/mysqld --basedir=/usr --datadir=/var/lib/mysql --...

Oct 26 14:26:39 server /etc/mysql/debian-start[6595]: mysql.time_zone_transit...
Oct 26 14:26:39 server /etc/mysql/debian-start[6595]: mysql.time_zone_transit...
Oct 26 14:26:39 server /etc/mysql/debian-start[6595]: mysql.user ...
Oct 26 14:26:39 server /etc/mysql/debian-start[6595]: Phase 2/6: Fixing views
Oct 26 14:26:39 server /etc/mysql/debian-start[6595]: Processing databases
Oct 26 14:26:39 server /etc/mysql/debian-start[6595]: information_schema
Oct 26 14:26:39 server /etc/mysql/debian-start[6595]: mysql
Oct 26 14:26:39 server /etc/mysql/debian-start[6595]: performance_schema
Oct 26 14:26:39 server /etc/mysql/debian-start[6653]: Checking for insecure r...
Oct 26 14:26:39 server /etc/mysql/debian-start[6657]: Triggering myisam-recov...
Hint: Some lines were ellipsized, use -l to show in full.
Bước 4. Cài đặt PHP (phiên bản PHP7.1)
PHP (viết tắt của cụm từ Personal Home Page) là ngôn ngữ lập trình kịch bản (scripting language) mã nguồn mở được dùng phổ biến để ra tạo các ứng dụng web chạy trên máy chủ. Mã lệnh PHP có thể được nhúng vào trong trang HTML nhờ sử dụng cặp thẻ PHP <?php ?>
Để cài dặt php 7.1, gõ theo lệnh sau :
Không có bản chính thức của PHP 7.1 trên kho ứng dụng của Ubuntu 16.04
Nếu bạn muốn dùng PHP 7.1, bạn cần thêm kho ppa:ondrej/php
Chạy các lệnh sau
sudo add-apt-repository ppa:ondrej/php
sudo apt-get update
sudo apt-get remove php7.0 (tùy chọn, nếu bạn muốn gỡ phiên bản cũ)
sudo apt-get install php7.1 (cài đặt php 7.1)
Cài thêm các thư viện, extentions
sudo apt-get update
sudo apt-get install php7.0-mysql php7.0-curl php7.0-json php7.0-cgi  php7.0 libapache2-mod-php7
Kiểm tra phiên bản PHP bạn vừa mới cài đặt
root@ubuntu:~# php -v
PHP 7.1 (cli) ( NTS )
Copyright (c) 1997-2016 The PHP Group
Zend Engine v3.0.0, Copyright (c) 1998-2016 Zend Technologies with Zend OPcache v7.0.6-dev, Copyright (c) 1999-2016, by Zend Technologies
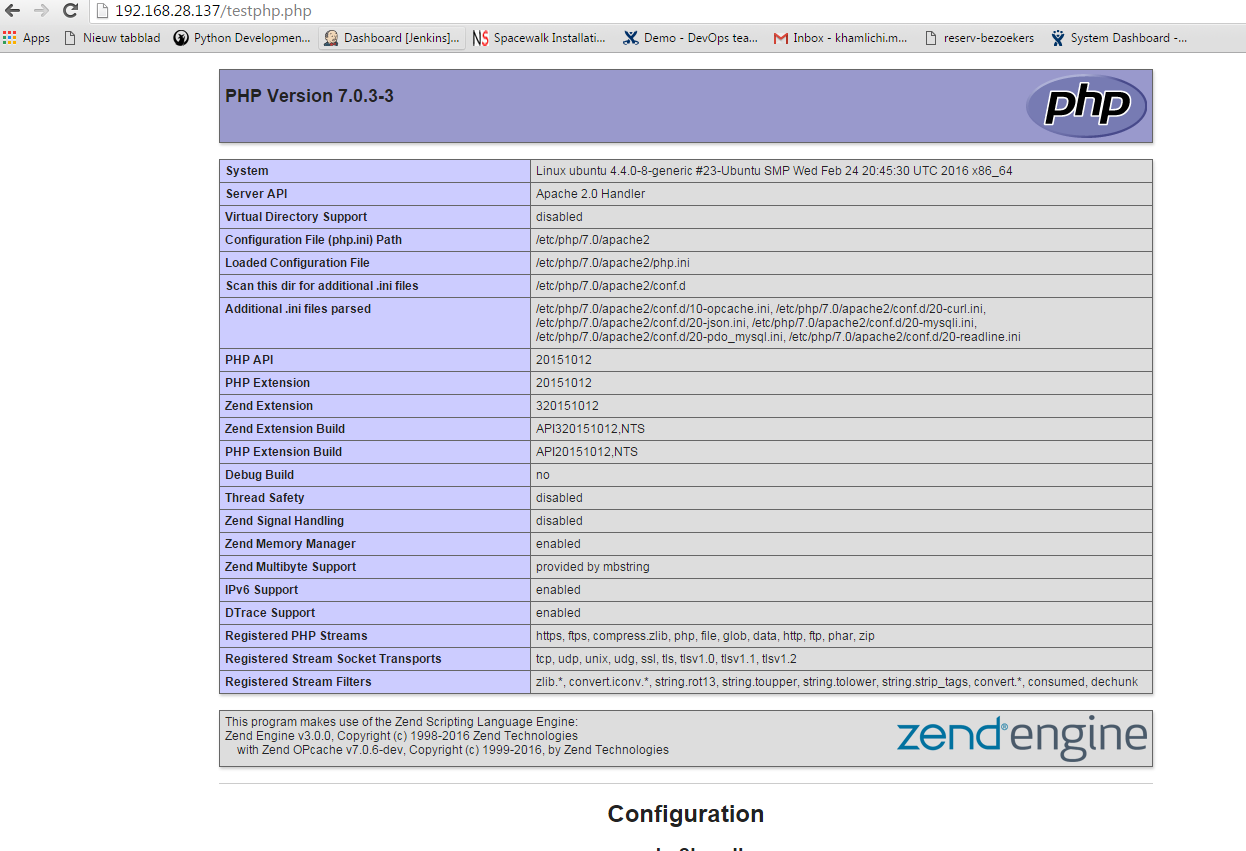
root@ubuntu:~#Để kiểm tra cấu hình PHP hiện tại, bạn tạo file “testphp.php” và đặt ở thư mục root của Apache
Chạy lệnh để tạo file sử dụng vim
sudo vim /var/www/html/testphp.phpThêm dòng dưới đây vào file
<?php
phpinfo();
?>
Khởi động lại Apache
Trên Ubuntu 16.0.4, 15.10/15.04:
sudo systemctl restart apache2Trên Ubuntu 14.10 hoặc các phiên bản ubuntu thấp hơn
sudo service apache2 restartMở trình duyệt và truy cập địa chỉ
Mở trình duyệt web của bạn(Chrome, Firefox, Cốc Cốc...), nhập một trong các địa chỉ sau
localhost/testphp.php
# hoặc
127.0.0.1/testphp.php
Nếu là vps server, có thể kiểm tra trực tiếp tại địa chỉ của máy chủ
server-ip-address/testphp.phpKết quả trả về sẽ hiển thị đầy đủ thông tin về phiên bản, trạng thái các extentions, ngày build...
Nếu bạn muốn cài đặt tất cả các modun php trong một lần, gõ lệnh
sudo apt-get install phpvà khởi động lại dịch vụ apache.
5. Manage MySQL Databases (Optional)
Install phpMyAdmin
phpMyAdmin is a free open-source web interface tool used to manage your MySQL databases. It is available in the Official Debian repositories. So install it with command:
sudo apt-get install phpmyadminSelect the Web server that should be automatically configured to run phpMyAdmin. In my case, it is apache2.
 The phpMyAdmin must have a database installed and configured before it can be used. This can be optionally handled by dbconfig-common.
Select ‘Yes’ to configure database for phpmyadmin wjth dbconfig-common.
The phpMyAdmin must have a database installed and configured before it can be used. This can be optionally handled by dbconfig-common.
Select ‘Yes’ to configure database for phpmyadmin wjth dbconfig-common.
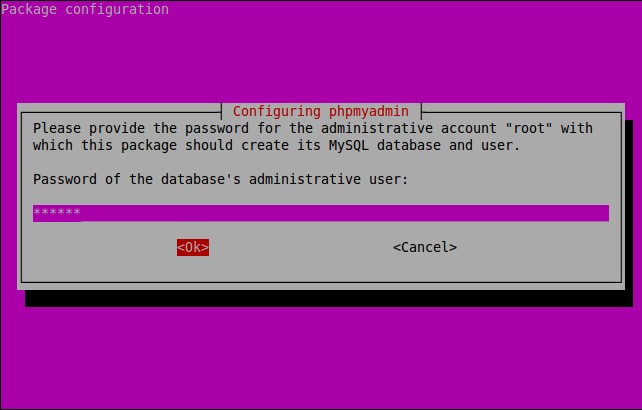
 Enter password of the database’s administrative user.
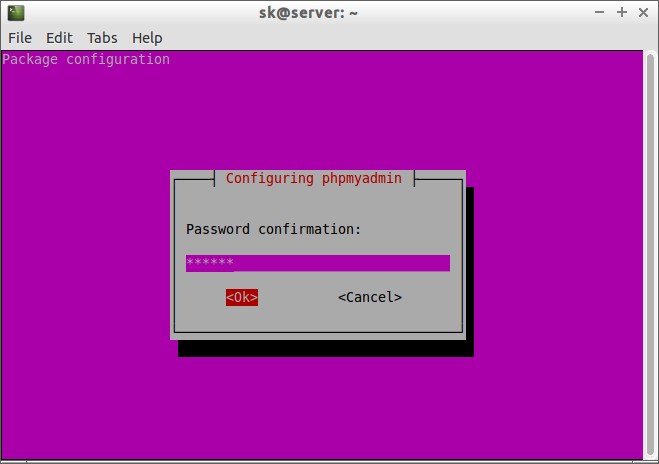
 Enter MySQL application password for phpmyadmin:
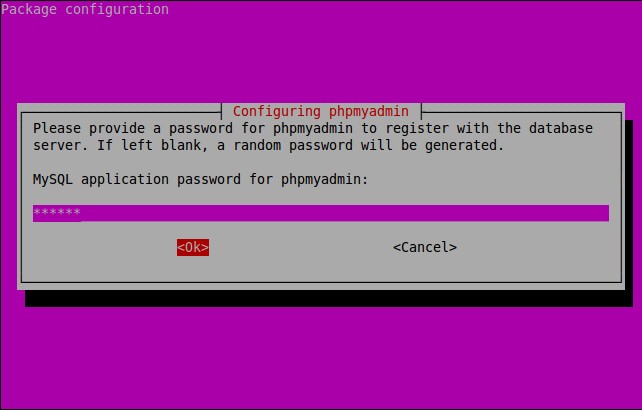 Re-enter password:
 Success! phpMyAdmin installation is installed.
Additional Note: if you followed all steps carefully, phpMyAdmin should work just fine. In case phpMyAdmin is not working, please do the following steps.
Open terminal, and type:
Success! phpMyAdmin installation is installed.
Additional Note: if you followed all steps carefully, phpMyAdmin should work just fine. In case phpMyAdmin is not working, please do the following steps.
Open terminal, and type:
sudo nano /etc/apache2/apache2.confAdd the following line at the end.
Include /etc/phpmyadmin/apache.confSave and Exit. Restart apache service: On Ubuntu 16.04/15.10/15.04:
sudo systemctl restart apache2On Ubuntu 14.10 and lower versions:
sudo /etc/init.d/apache2 restart6. Access phpMyAdmin Web Console
Now, you can access the phpmyadmin console by navigating to http://server-ip-address/phpmyadmin/ from your browser.
Enter your MySQL username and password which you have given in previous steps. In my case its “root” and “ubuntu”.
 You will be redirected to PhpMyAdmin main web interface.
 From here, you can manage your MySQL databases from phpMyAdmin web interface.
That’s it. Your LAMP stack is ready to use.
From here, you can manage your MySQL databases from phpMyAdmin web interface.
That’s it. Your LAMP stack is ready to use.
Nguồn : https://www.unixmen.com/how-to-install-lamp-stack-on-ubuntu-16-04/